Introduction
Are you interested in building a website using the popular Divi Theme Builder for WordPress?
Look no further! In this step-by-step guide, we will walk you through the process of creating a stunning website, tailored to your unique vision and style.
Whether you’re an entrepreneur or simply someone looking to establish a strong online presence, this guide is perfect for you.
Say goodbye to the technical headaches of building a website from scratch and hello to aquick and user-friendly experience as we explore the power of Divi and WordPress.
Let’s dive right in and unlock the potential of building a professional website with ease.
Why Building Your Own Website Matters
Building a website matters because it allows you to create a professional online presence that can enhance your business.
With a customized website, you can improve the customer experience, increase visibility, and optimize for SEO.
Unlike relying solely on social media platforms, having a website offers more versatility and reliability in showcasing your products or services to a wider audience.
Introducing Divi Theme Builder
Introducing the Divi Theme Builder, the ultimate WordPress Theme Builder for entrepreneurs and website owners.
Divi stands out among all other theme builders with its exceptional versatility and user-friendly interface.
With the Divi Theme Builder, you have the power to create stunning websites with dynamic content and responsive designs to build a website people will notice.
Not only is it affordable and comes with a lifetime membership option, but it also offers seamless integration with other themes and plugins, making it an ideal choice for any website project.
Experience the magic of hover options, layout packs, typography choices, and the convenient find and replace feature.
Plus, Divi includes an email opt-in and lead generation plugin, as well as a social media sharing plugin for enhanced engagement.
Divi also comes with the EXTRA magazine theme which is a fully loaded blog/magazine theme with added features that’ll make your high content website stand out among the top ones in your field.
Trust me, you won’t want to miss out on the chance to be a part of the superb Divi community and the amazing holiday deals.
And, you don’t need to opt for the lifetime option right away, feel free to try the year, and pick up the lifetime deal during the holidays, you’ll get prorated, and some extra treats.
Why Use a Pre-Made Layout?
Using a pre-made Divi layout for your portfolio website offers several advantages.
Firstly, it saves you time and effort by providing a ready-made design that is visually pleasing and professionally crafted.
Secondly, it allows you to focus on showcasing your work and expertise without worrying about the technical aspects of web design.
Finally, the flexibility of Divi layouts enables you to customize and personalize your portfolio according to your branding and style preferences.
Overall, using a pre-made layout expedites the process of creating a stunning portfolio website, making it an ideal choice for entrepreneurs.

Step 1: Get Hosting Domain and SSL
Choosing the Right Hosting Provider
Choosing the right hosting provider for your Divi website is crucial. Not only does it impact your website’s performance, but it also affects your budget and overall experience.
When considering hosting options, make sure to find one that aligns with your budget. Look for a provider that offers hosting plans suitable for your needs.
Additionally, it is essential to select a hosting provider that specifically supports Divi. This ensures seamless compatibility and optimal performance.
Ease of use is another important factor to consider. Look for a hosting provider that offers a user-friendly interface and intuitive tools.
It’s also worth noting that the hosting provider should offer the features you require, such as ample storage, bandwidth, and reliable security measures.
Lastly, excellent customer support is a must. Having a reliable support team that can assist you whenever you encounter any issues or have questions is invaluable.
Consider exploring hosting providers like Cloudways, Rocket.net, and Flywheel, as they are known for their stellar performance and exceptional support.
Registering a Domain Name
Registering a domain name is a crucial step in establishing your online presence.
A catchy, short, and easy-to-remember domain name not only helps with branding but also improves your website’s visibility in search engine rankings.
It’s important to get your domain name from a reliable source, and it doesn’t necessarily have to be with your hosting company.
We recommend Namecheap as a trustworthy platform to secure your perfect domain name hassle-free.
Configuring SSL Certificate
Configuring an SSL certificate for your website is a crucial step in ensuring secure and encrypted communication between your visitors and your site.
Luckily, most hosting companies offer a free SSL certificate along with their hosting plans.
The process of configuring the SSL certificate may vary depending on your hosting company, but don’t worry, it’s a straightforward process.
Simply follow the documentation provided by your hosting company and configure the necessary DNS records.
Rest assured, with a little guidance, you’ll have your SSL certificate up and running smoothly in no time.

Step 2: Setup WordPress
Installing WordPress
To setup WordPress, follow these steps.
Firstly, check if your hosting provider has already installed WordPress for you.
If not, don’t worry! You can easily set it up yourself. Simply go to the WordPress website and download the latest version.
Then, upload the WordPress files to your hosting server using an FTP client.
Finally, create a MySQL database with your host’s tool, usually phpMyAdmin and run the WordPress installation script with the database name and password you wet it up with, default is just root.
Within minutes, you’ll have a fully functional WordPress website ready to customize and launch!
Configuring Basic Settings
To configure basic settings in WordPress, start by accessing the admin dashboard.
From there, navigate to the Settings tab and explore the various options available.
Customize your site title, tagline, and permalink structure to reflect your brand and improve search engine optimization.
Additionally, don’t forget to set your preferred date and time format, as well as the timezone to ensure accurate scheduling and publishing.
With these simple adjustments, you can personalize your WordPress site and enhance its functionality effortlessly.

Step 3: Install Divi on WordPress
Purchasing and Downloading Divi Theme
To purchase and download Divi Theme, simply visit the official website of Elegant Themes and navigate to the Divi Theme page. Click on the Get Divi button and choose your desired plan.
Once you’ve completed the purchase, you’ll receive an email with the download link. Click on the link and follow the instructions to successfully download and install Divi Theme on your website.
Installing Divi Theme
To install Divi Theme, start by downloading the theme file from the email you received or directly from the Elegant Themes website Account page.
Then, log in to your WordPress dashboard and navigate to the Appearance > Themes section. Click on the Add New button, select the downloaded Divi Theme file, and click on the Install Now button.
Once the theme is installed, you can customize the parameters and settings to suit your needs. Additionally, you can set up your website’s home and blog pages in WordPress and configure the Settings to make your website a static site with a designated home page if desired.

Step 4: Use a Pre-Made Layout
Adding the Pre-Made Layout
To create an attention-grabbing homepage using the Divi theme, follow these steps:
Start by setting up a new page if you haven’t already. Choose a name that reflects your brand and catches the eye. Remember, a catchy title is crucial for SEO and getting your site noticed.
Now, let’s unleash the power of Divi. Click on the ‘Edit with Divi’ button located in the middle of your page. Once you’re in the Divi Page Builder, locate the Plus sign at the bottom. This small icon is your access point to amazing pre-designed layouts.
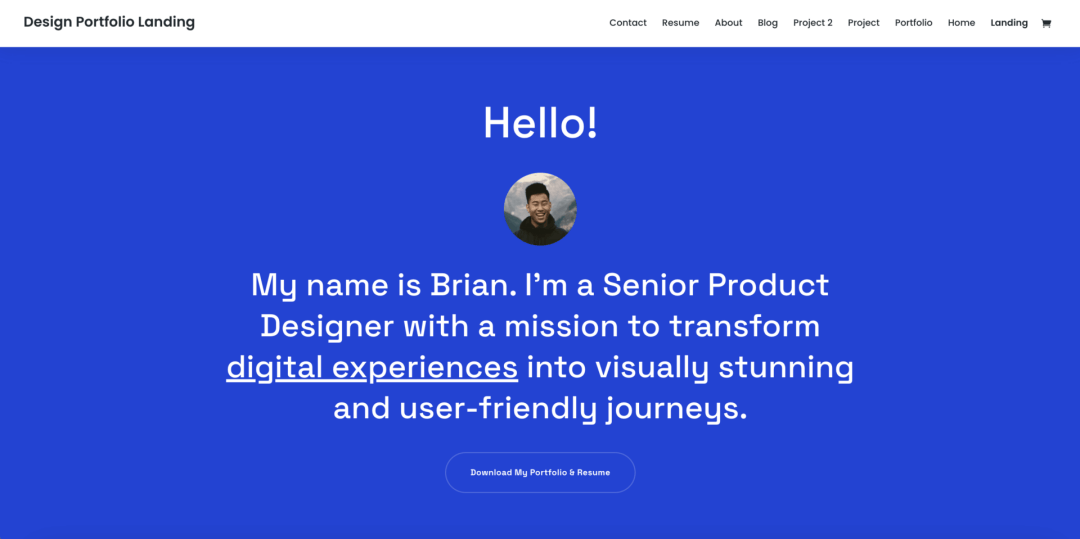
For this tutorial, we’ll select the Design Portfolio Layout. It’s sleek, professional, and perfect for showcasing your work. Choosing this layout is simple – just click on it and then select ‘use this layout’. By default, it will become your landing page, instantly transforming your homepage into the stunning Design Portfolio Layout.
Now you’re on your way to building your own website with an eye-catching homepage using the Divi theme.
Customizing the Layout
Now that we’ve got your homepage set up with a stunning layout, let’s jazz it up and make it truly yours. Customizing your Divi layout is where your creativity gets to shine and where your site begins to really speak your brand language.
Editing the Color Scheme
To edit the color scheme, head over to the Divi Menu on the left-hand side of the WordPress Menu (not to be confused with the Customize options in the Appearance menu). Within the Divi Theme Options, you’ll find the option to change a total of 8 colors. Feel free to keep them as they are or switch them up entirely, as you’ll have the opportunity to modify the colors of everything within the Divi Page Builder. This is where you can define and edit the Global Color Styles for your page and site.
Editing the Text and Images with Modules
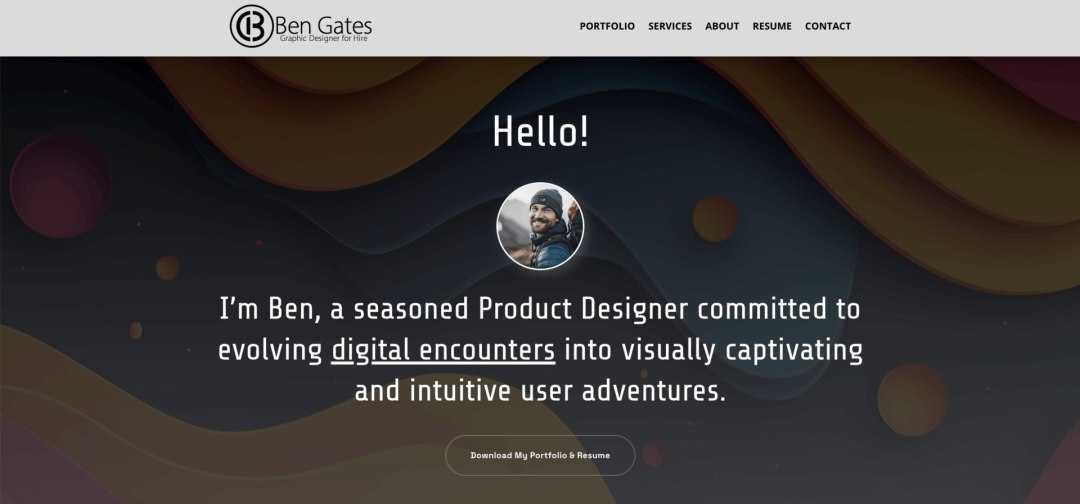
First, immerse yourself in the world of Divi modules. These are like little building blocks for your website. You’ll find everything from text and images to sliders and call-to-action buttons. Click on any module, and a customization panel pops up. Here’s where the fun begins – play around with the settings! Change the fonts, adjust the colors, and add your own flair. Remember, your website is a reflection of your business, so let your brand’s personality leap off the page.
Got some awesome images of your products or services? Great! Swap out the default images in the layout with your own. This not only personalizes your site but also helps potential customers connect with what you’re offering. And don’t forget about the text – tweak the headlines and body copy to resonate with your audience. Your words are powerful; use them to tell your story and convey your brand’s message.
Adding Additional Sections & Pages
Why not take it a step further? Divi enables you to explore the structure of your layout. Need a broader column in this area or a full-width section over there? Consider it done! Easily rearrange elements with a simple drag and drop, or customize the spacing and size using row and section settings. It’s like having a digital canvas to bring your business vision to life.
Checking the Responsiveness
And for the grand finale – responsiveness. In today’s digital landscape, it’s crucial that your website appears visually appealing across all devices. Fortunately, Divi has got you covered. Take a moment to evaluate how your site appears on mobile and tablets, making any necessary adjustments. The goal is to provide your visitors with a seamless experience, regardless of their location.
And there you have it! Unleash your creative side and personalize your Divi layout to develop a website that not only looks incredible but also resonates with your brand and directly engages your audience. Remember, your website serves as the digital face of your business – let’s make it unforgettable!
Step 5: Optimizing for SEO
Setting Up Meta Tags and Descriptions
When creating a portfolio website using Divi, it’s important to set up meta tags and descriptions to optimize your site’s visibility.
To do this, navigate to the SEO settings in the Divi Theme Options section of your dashboard. From there, enable the custom title, meta description, and meta keywords settings for your home page, posts, and other pages.
This will help search engines understand and index your website better, increasing its chances of being discovered by potential clients and customers.
Optimizing Images and URLs
Optimizing images and URLs for your Divi portfolio website is crucial for a seamless user experience and improved search engine visibility.
By compressing and resizing your images, you can ensure faster page load times and reduce bounce rates. A great plugin that can do this for you is Image optimization service by Optimole.
Additionally, creating descriptive and keyword-rich URLs helps search engines understand the content of your web pages, potentially increasing organic traffic and attracting more potential clients to your portfolio.
Installing an SEO Plugin
Installing an SEO plugin can be a game-changer for entrepreneurs looking to optimize their website’s search engine rankings.
One highly recommended plugin is RankMath. With its user-friendly interface and powerful features, RankMath takes the guesswork out of SEO.
It offers a comprehensive set of tools, including keyword optimization, XML sitemap generation, and advanced schema markup options.
By utilizing RankMath, entrepreneurs can effortlessly enhance their website’s visibility in search engine results pages, attract more organic traffic, and ultimately boost their online presence.
Don’t underestimate the impact of an SEO plugin like RankMath – it’s a valuable asset for any business looking to stay competitive in the digital landscape.
Conclusion
In conclusion, building a website with Divi Theme Builder for WordPress is a straightforward and empowering process.
By following our build a Divi website a stepbystep guide, we help you create a professional and visually stunning website that represents your brand effectively.
Don’t forget to check out the related blog articles below for further support and inspiration.
Get started today and unlock endless possibilities for your online presence. Happy website building, entrepreneurs!
If you’d like to enlist our help with SEO or our other Digital Marketing Services drop us a line below, or click here.